Cloudflare Pages Deployment
Cloudflare Pages is the recommended deployment method, offering free hosting, global CDN acceleration, and no server maintenance required.
📂 Step 1: Fork the Project
- Visit CloudFlare ImgBed Project
- Click the "Fork" button in the top right corner
- Select your GitHub account
- Confirm the Fork is complete
🏗️ Step 2: Create Pages Project
2.1 Access Cloudflare Dashboard
- Login to Cloudflare Dashboard
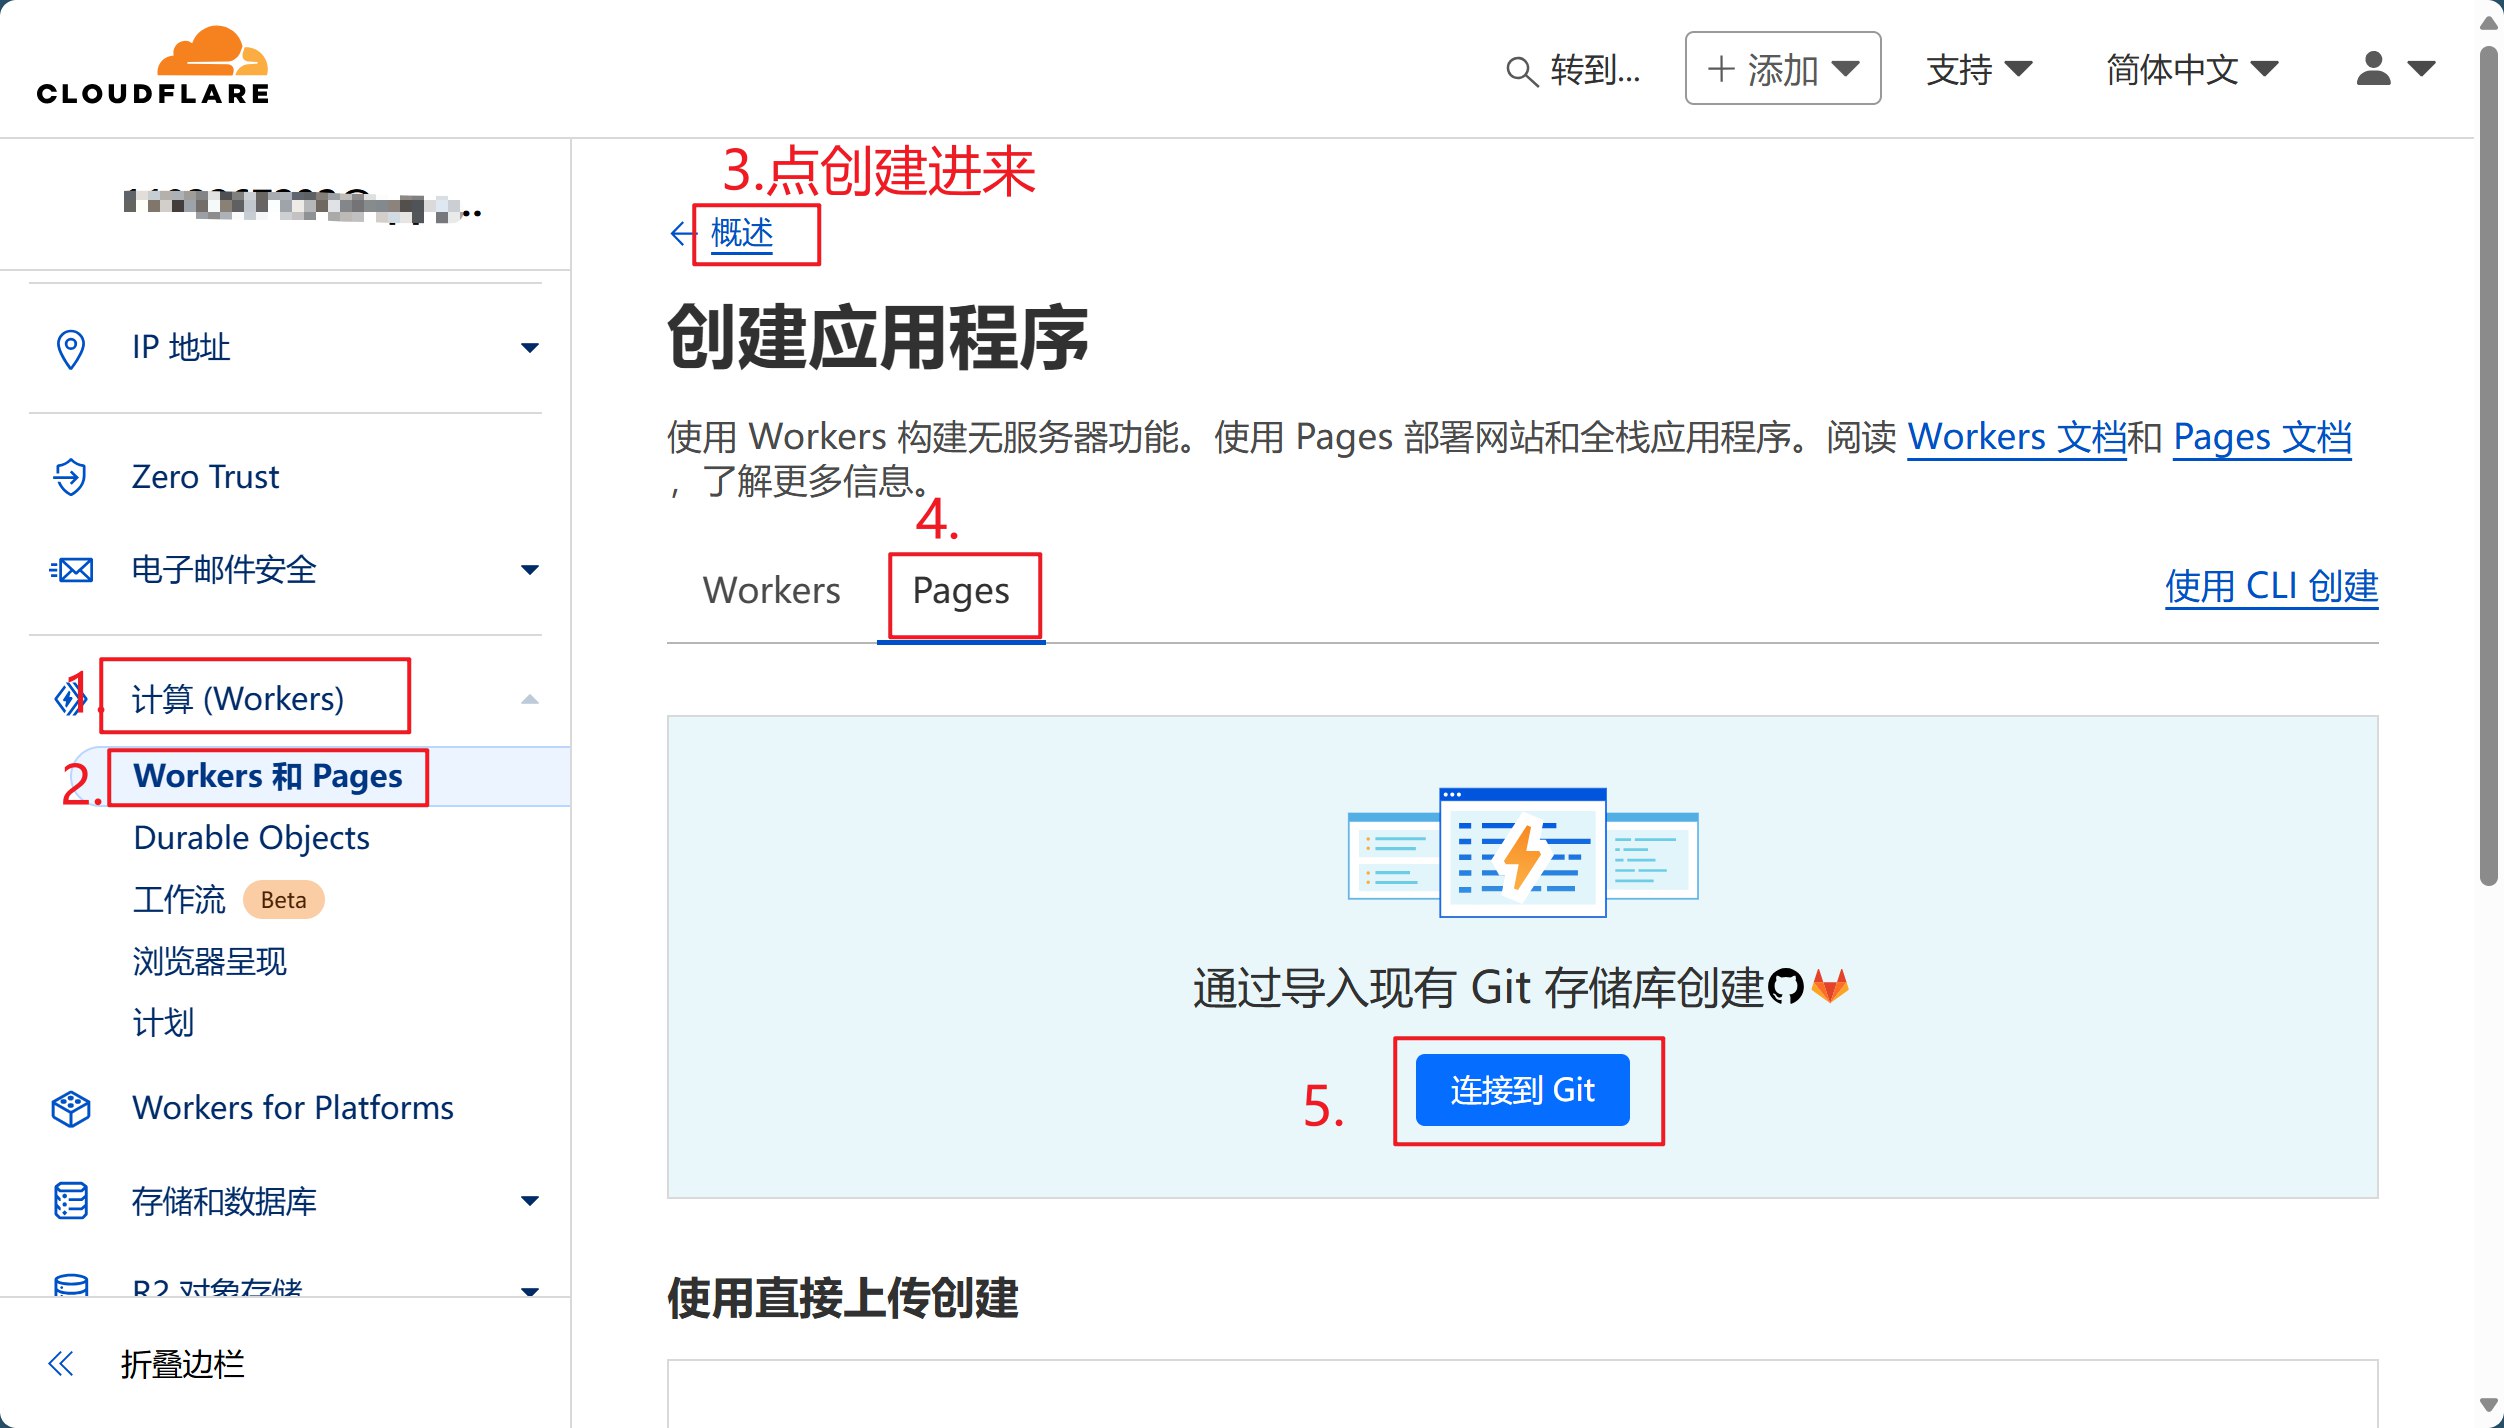
- Select the "Compute & AI" -> "Workers & Pages" from the left menu
- Click "Create application"
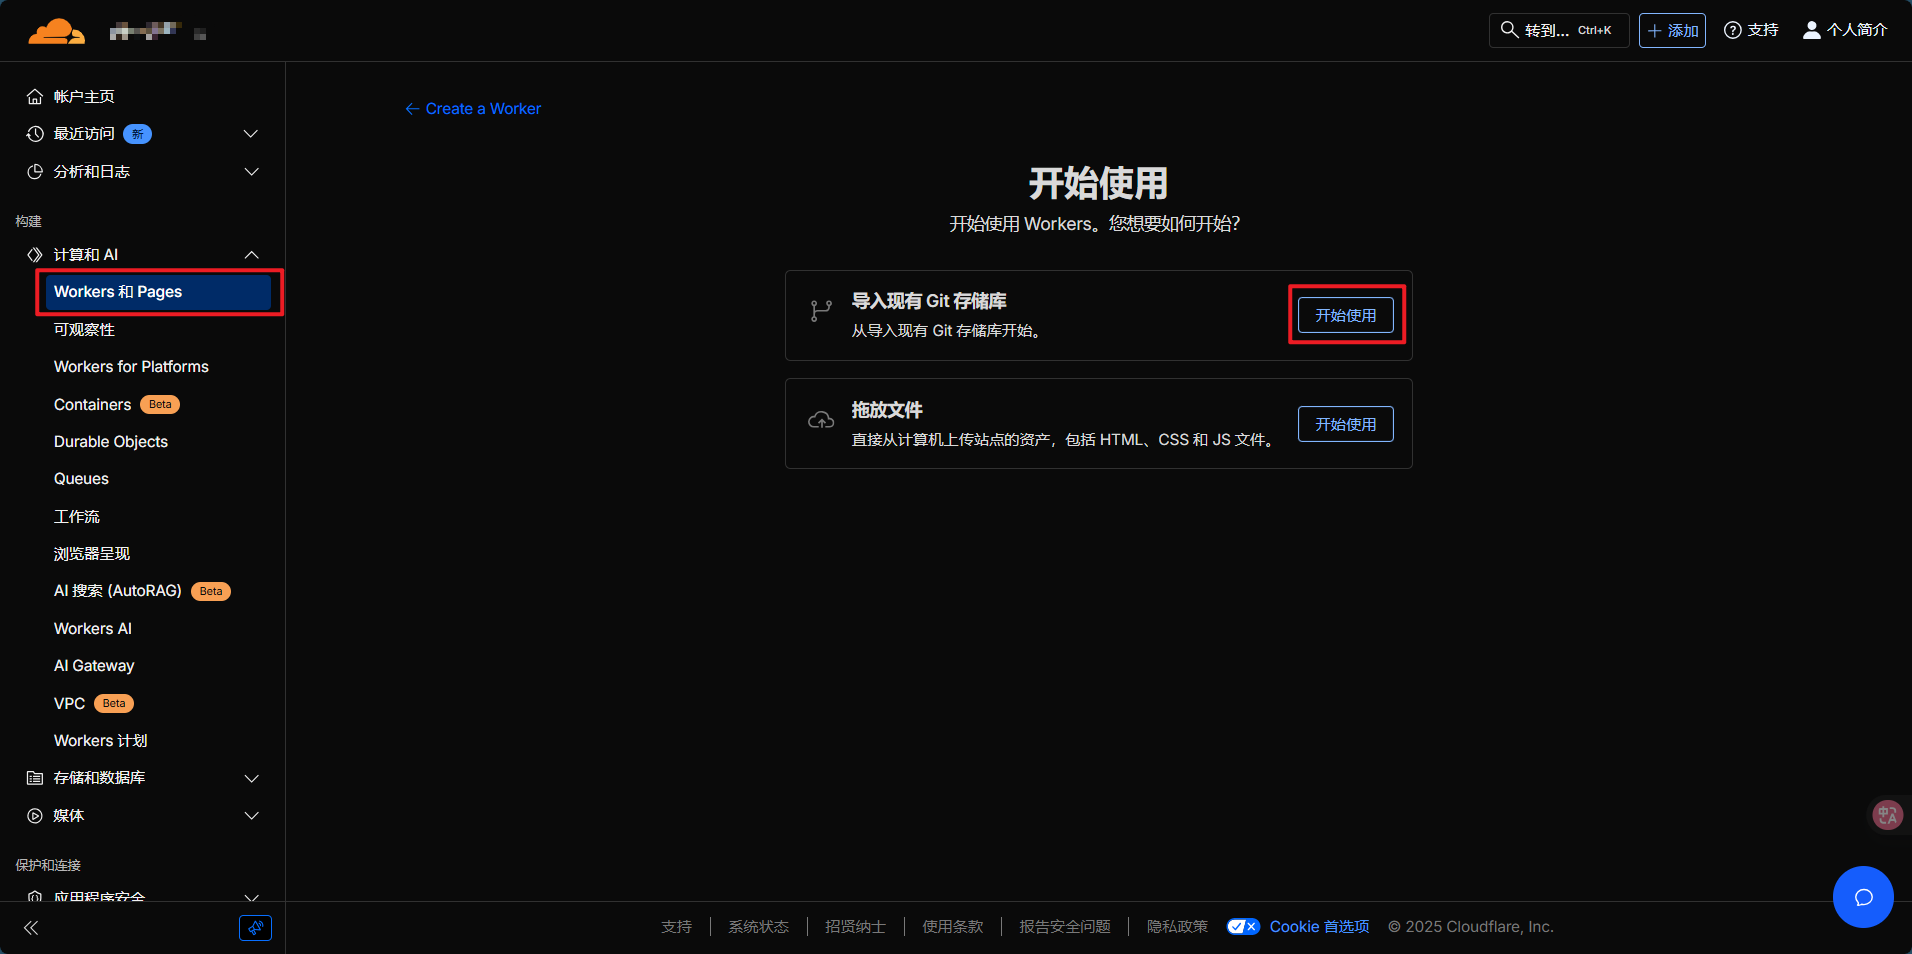
- At the bottom, under
Looking to deploy Pages?, select "Get started" - Click "Start with an existing Git repository"
2.2 Connect GitHub Repository
- If using for the first time, authorize Cloudflare to access GitHub
- Select your forked
CloudFlare-ImgBedrepository - Click "Begin setup"
2.3 Configure Project Settings
| Configuration | Value | Description |
|---|---|---|
| Project name | cloudflare-imgbed (or custom) | Project identifier |
| Production branch | main | Production environment branch |
| Build command | npm install | Important: v2.0 new build command |
| Build output directory | / | Keep default |
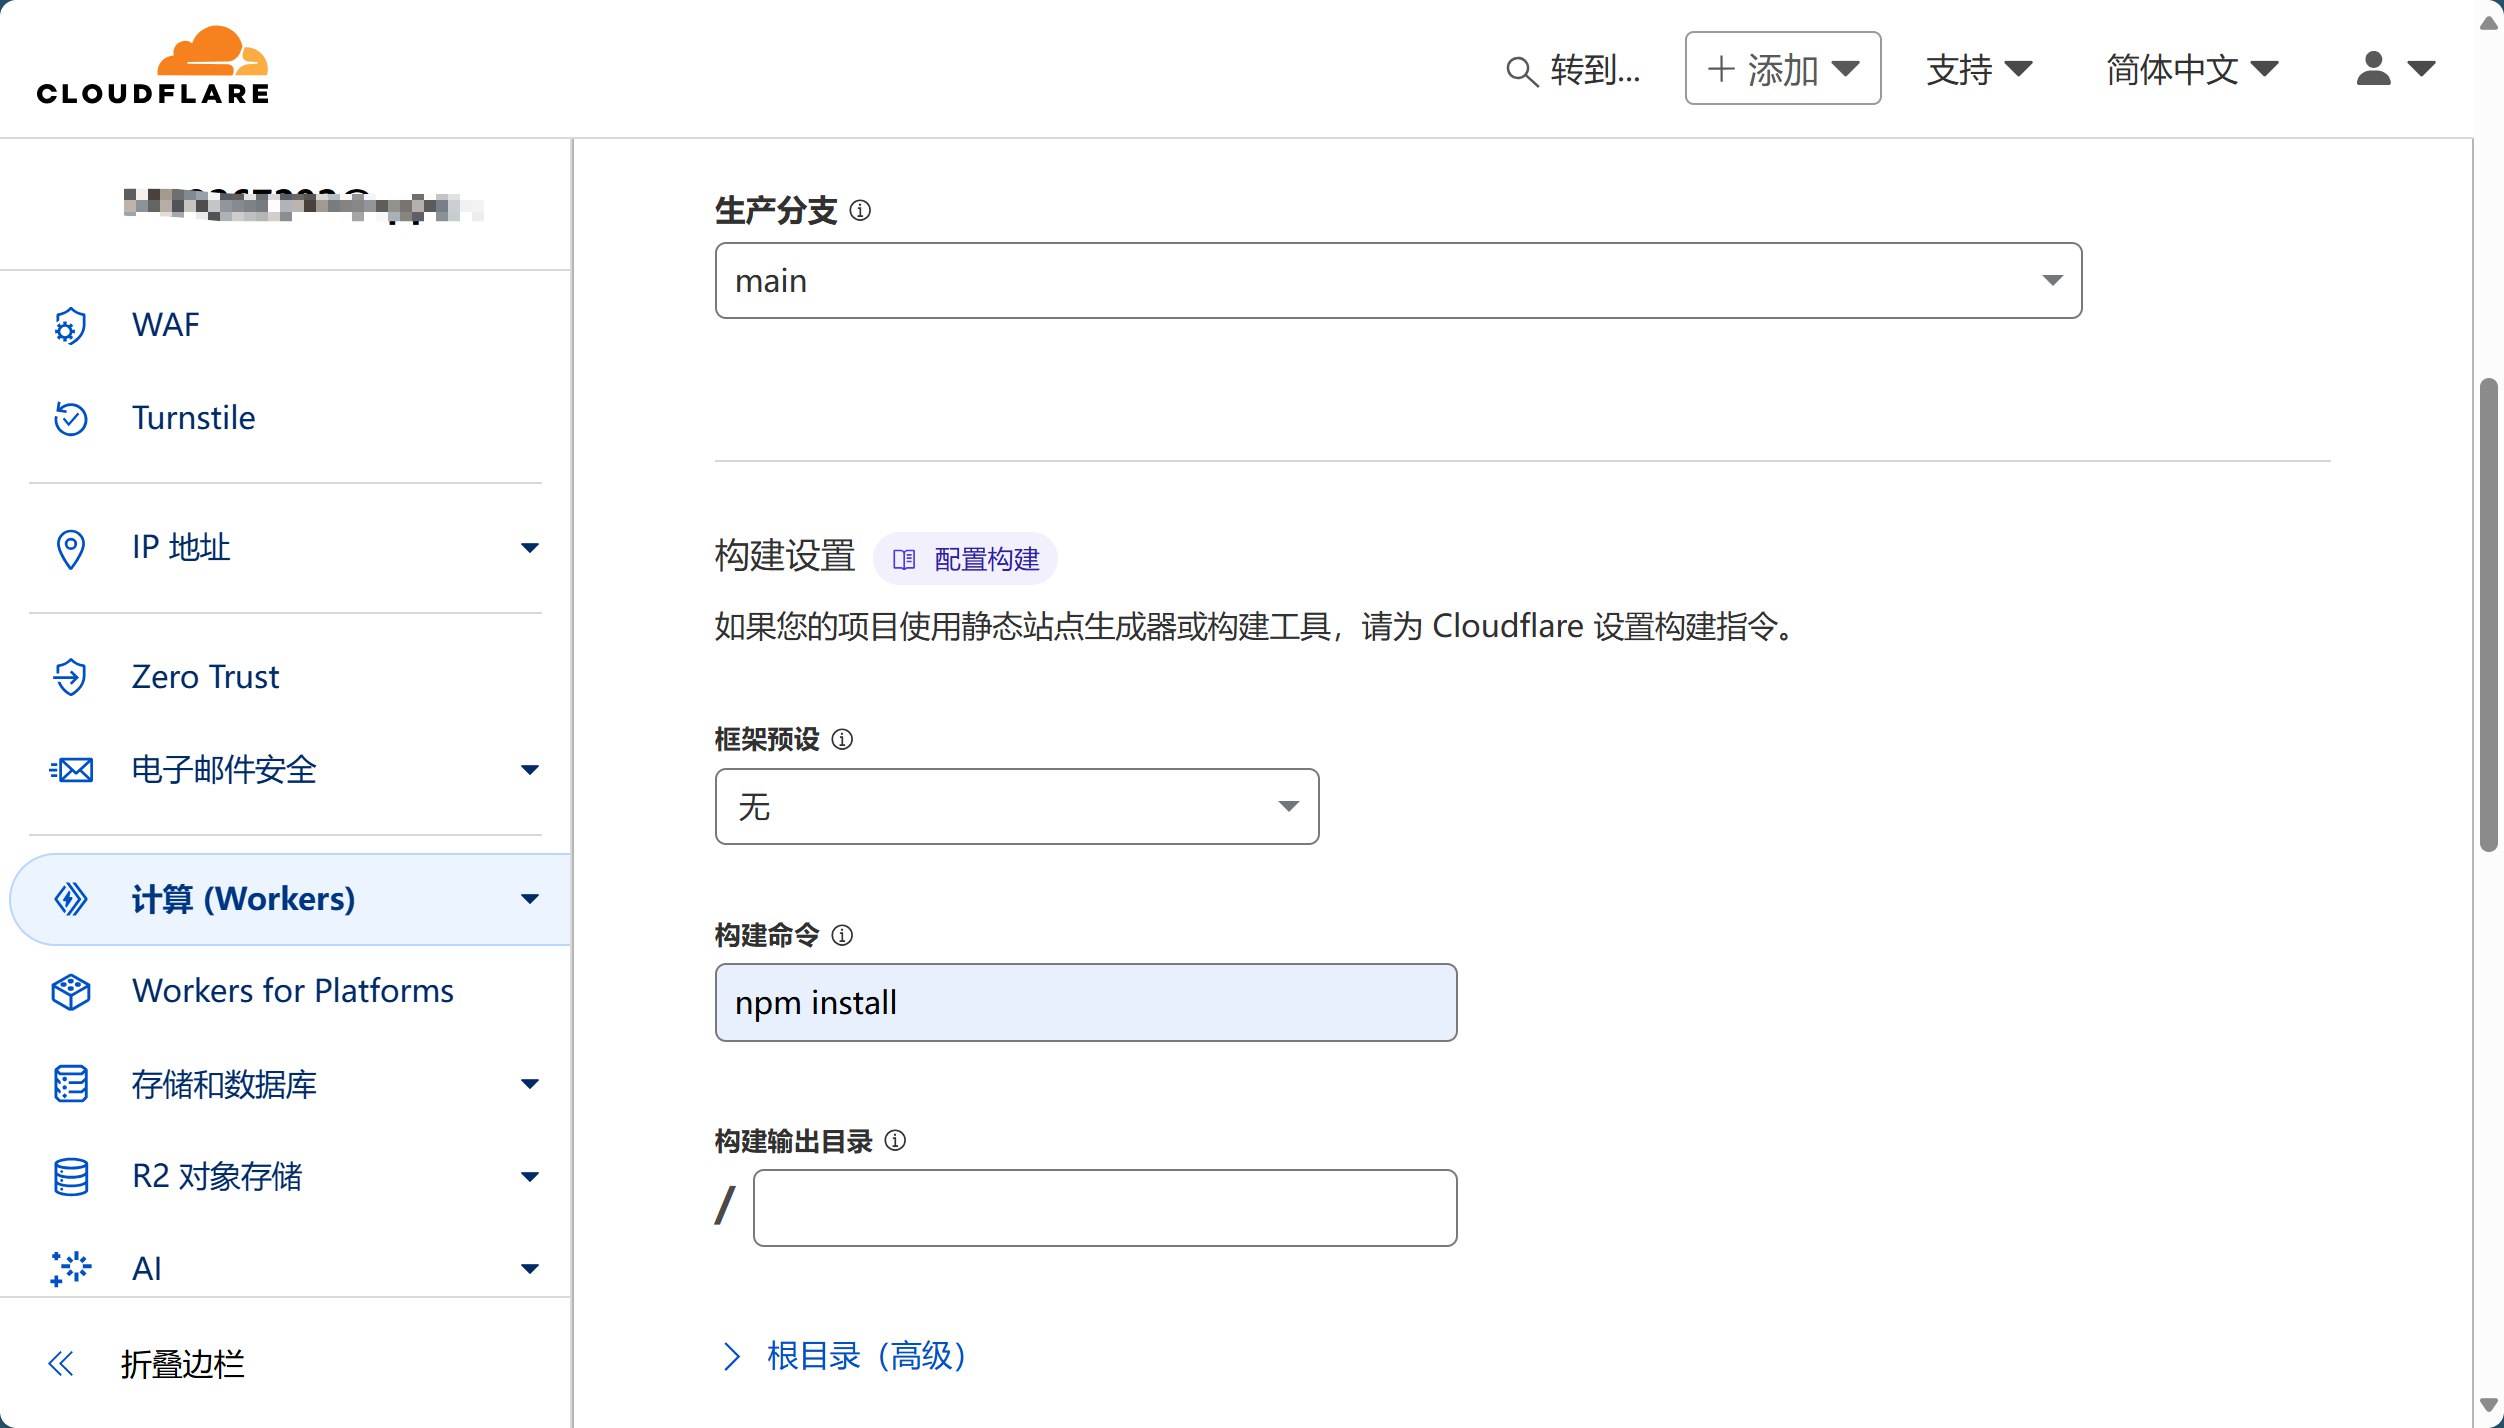
Important Notice
The build command for v2.0 has changed to npm install. Please ensure you use the correct build command.
2.4 Deploy Project
- Click "Save and Deploy"
- Wait for the first deployment to complete (about 2-3 minutes)
🗄️ Step 3: Configure Database
The database is used to store file metadata and is a required component. You can choose between KV database and D1 database. The comparison is shown in the table below. Please choose one based on your usage scenario.
| Feature | KV Database | D1 Database |
|---|---|---|
| Read/Write Performance | High | Lower |
| Free Quota | Less | More |
Important
You only need to configure one of KV or D1 database, not both! Please choose the database type that suits your needs based on the table above.
3.1 KV Database Configuration
Create KV Namespace
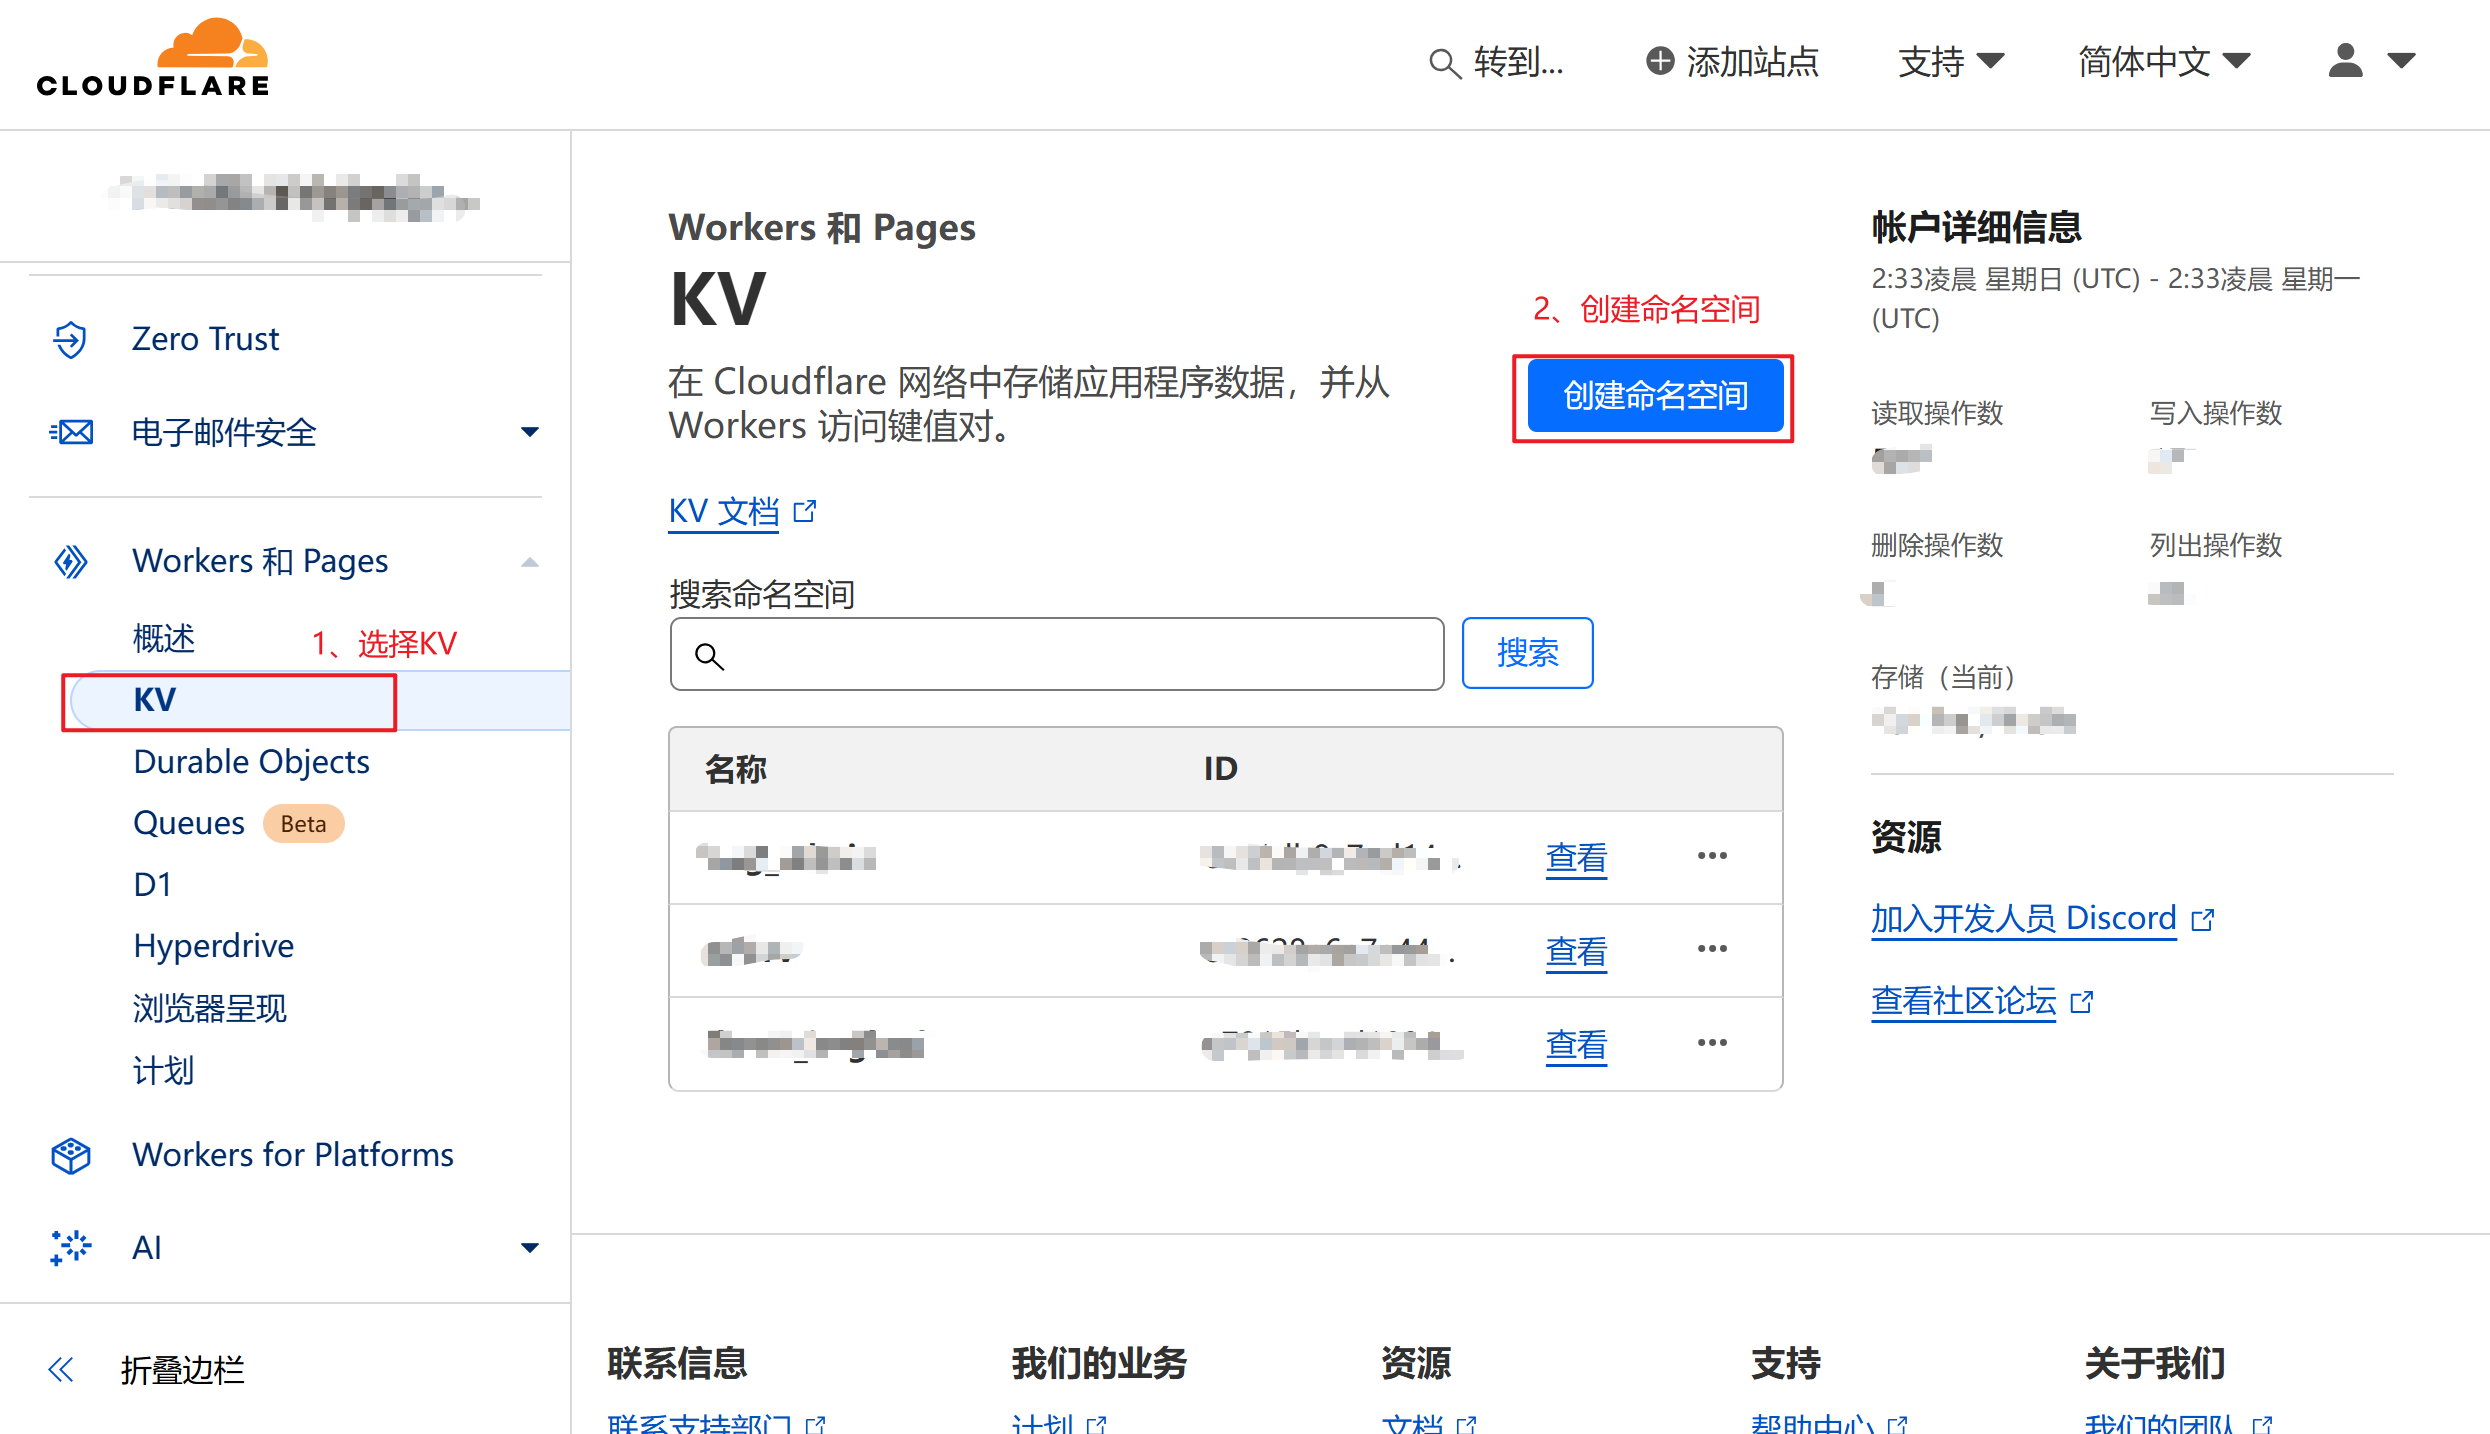
- In Cloudflare Dashboard, select "Storage & Databases"
- Click "Workers KV"
- Click "Create instance"
- Enter namespace name:
img_url(recommended name) - Click "Create"
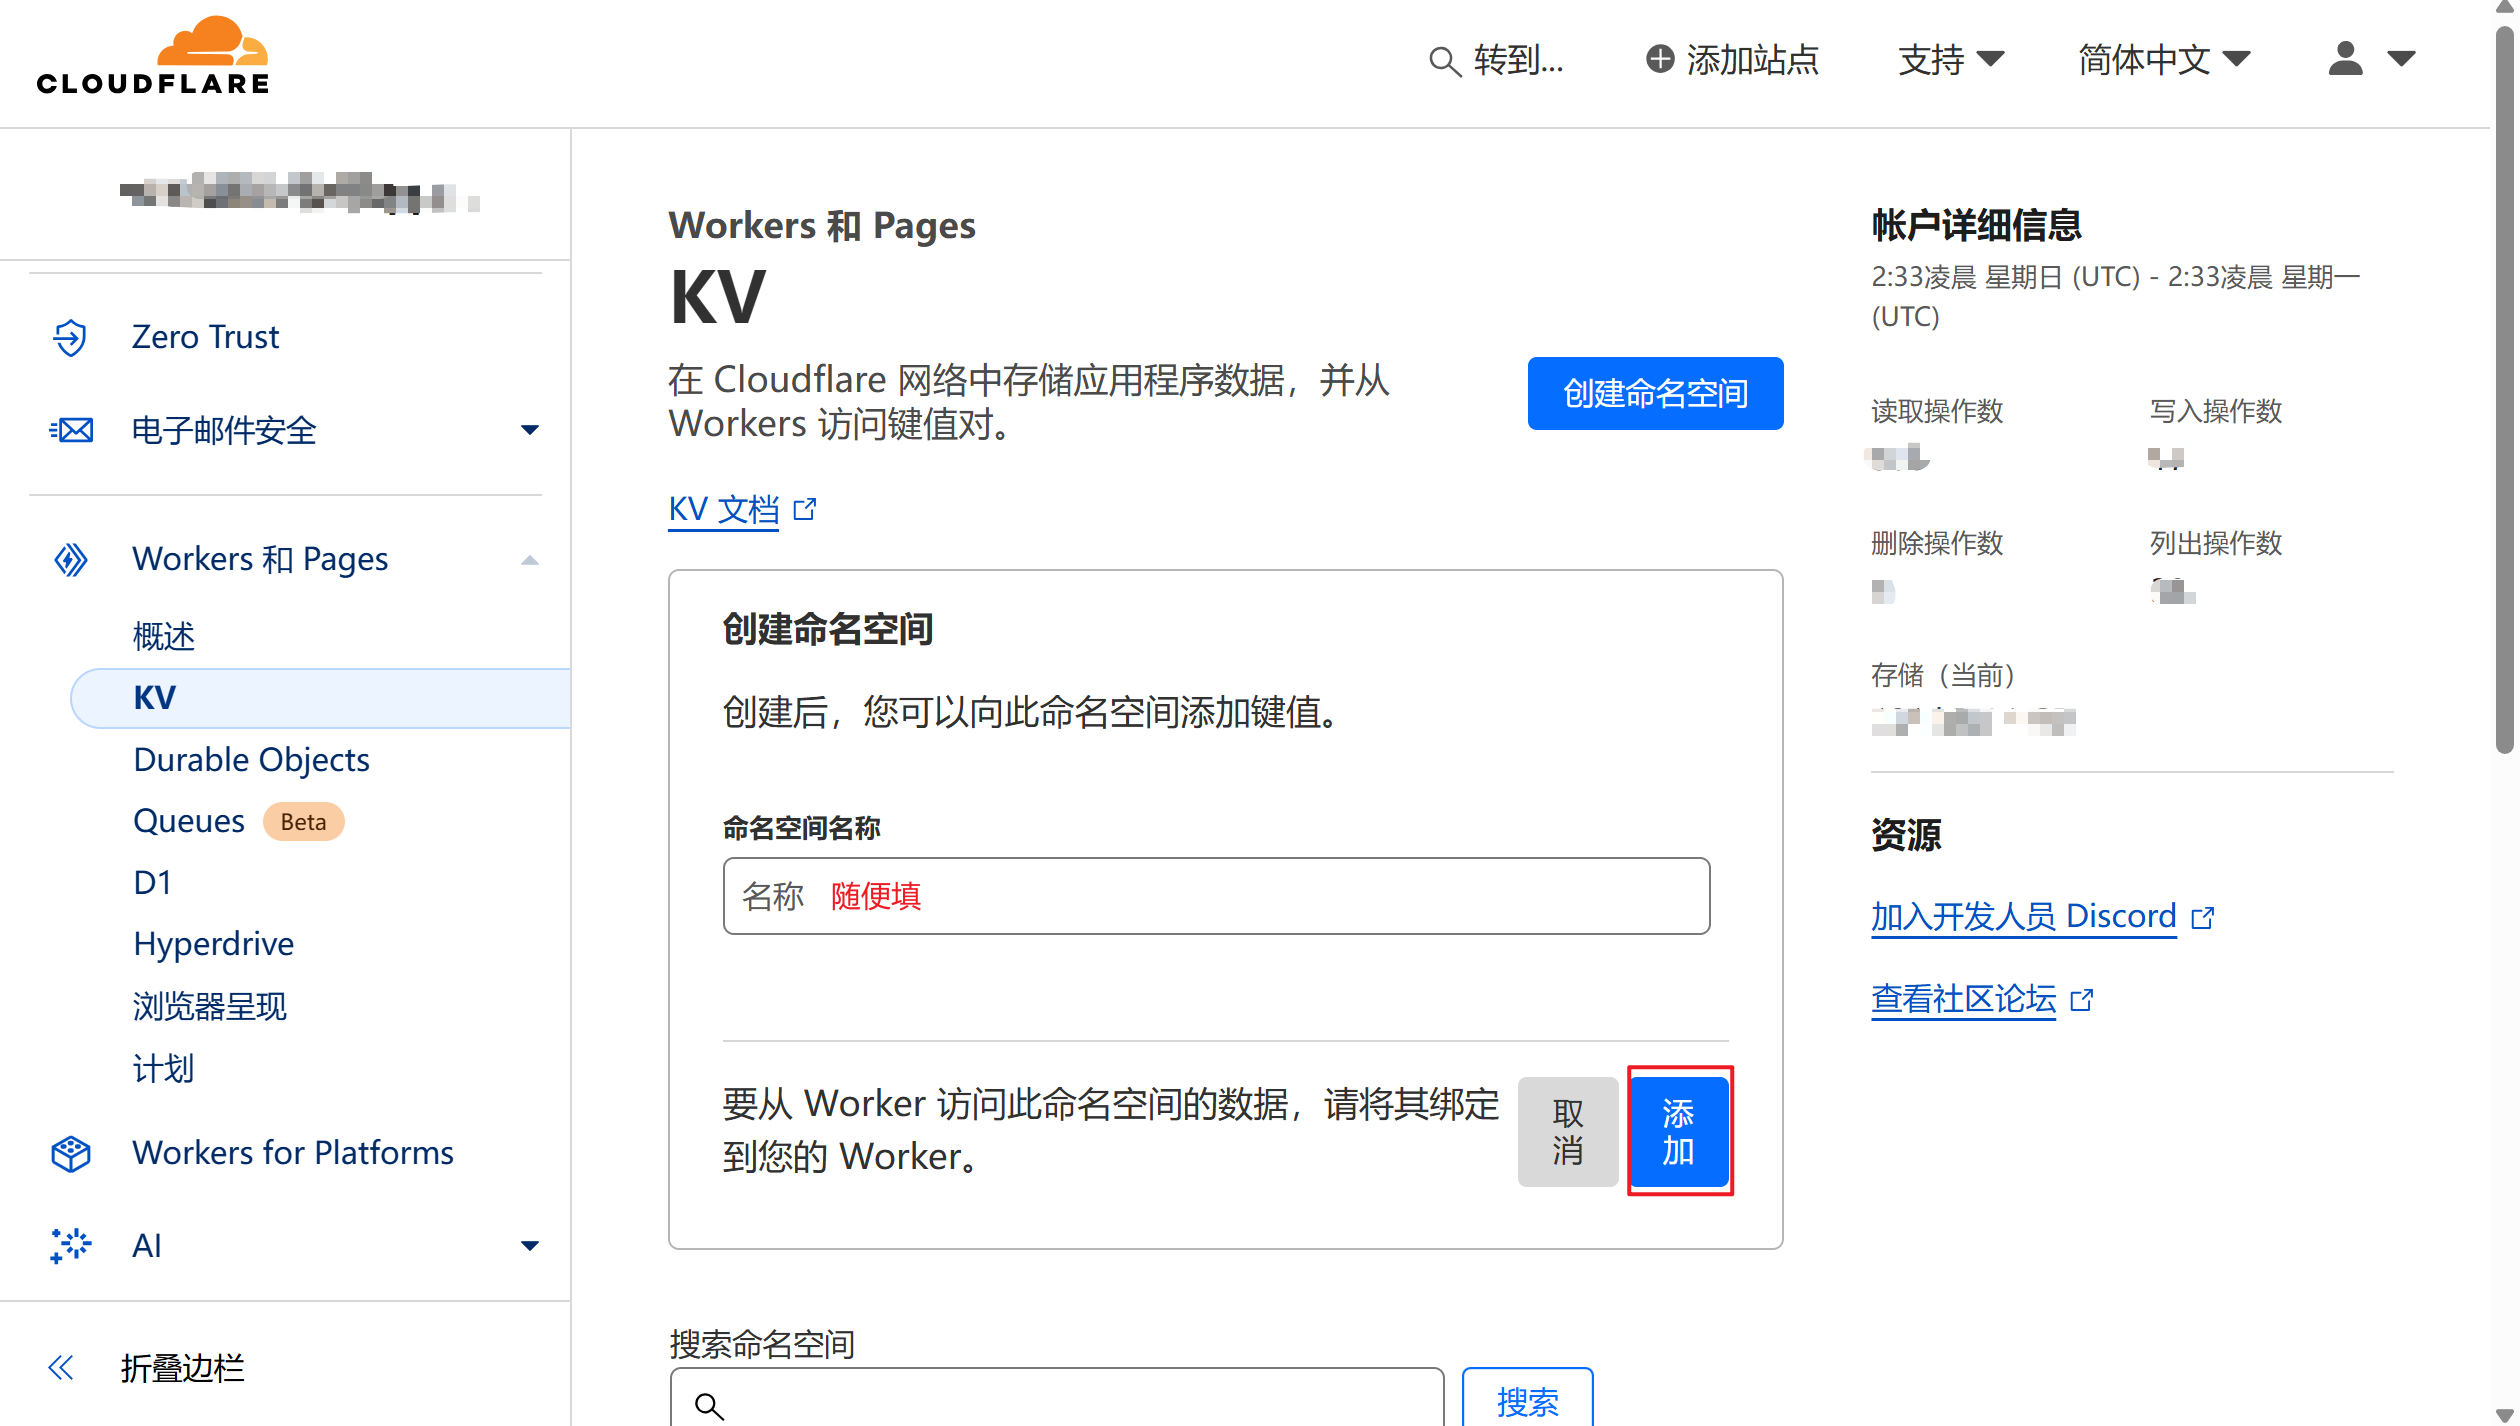
Bind KV to Project
- Return to your Pages project
- Select "Settings" → "Functions"
- Click "Add" → "KV namespace"
- Fill in binding information:
- Variable name:
img_url(must be this name) - KV namespace: Select the namespace you just created
- Variable name:
- Click "Save"
Note
When binding KV, the variable name must be img_url, which is the preset variable name for the project. Incorrect naming will cause issues such as inability to access the admin interface.
3.2 D1 Database Configuration
Create D1 Database
- In Cloudflare Dashboard, select "Storage & Databases"
- Click "D1 SQL Database"
- Click "Create database"
- Enter database name:
img_d1(recommended name) - Click "Add"
Initialize D1 Database
- After creation, click to enter the database details page
- Select the "Console" tab
- Paste and execute the content below the comments in the SQL input box. (see project repository)
- Click "Execute"
Bind D1 to Project
- Return to your Pages project
- Select "Settings" → "Functions"
- Click "Add" → "D1 database"
- Fill in binding information:
- Variable name:
img_d1(must be this name) - D1 database: Select the database you just created
- Variable name:
- Click "Save"
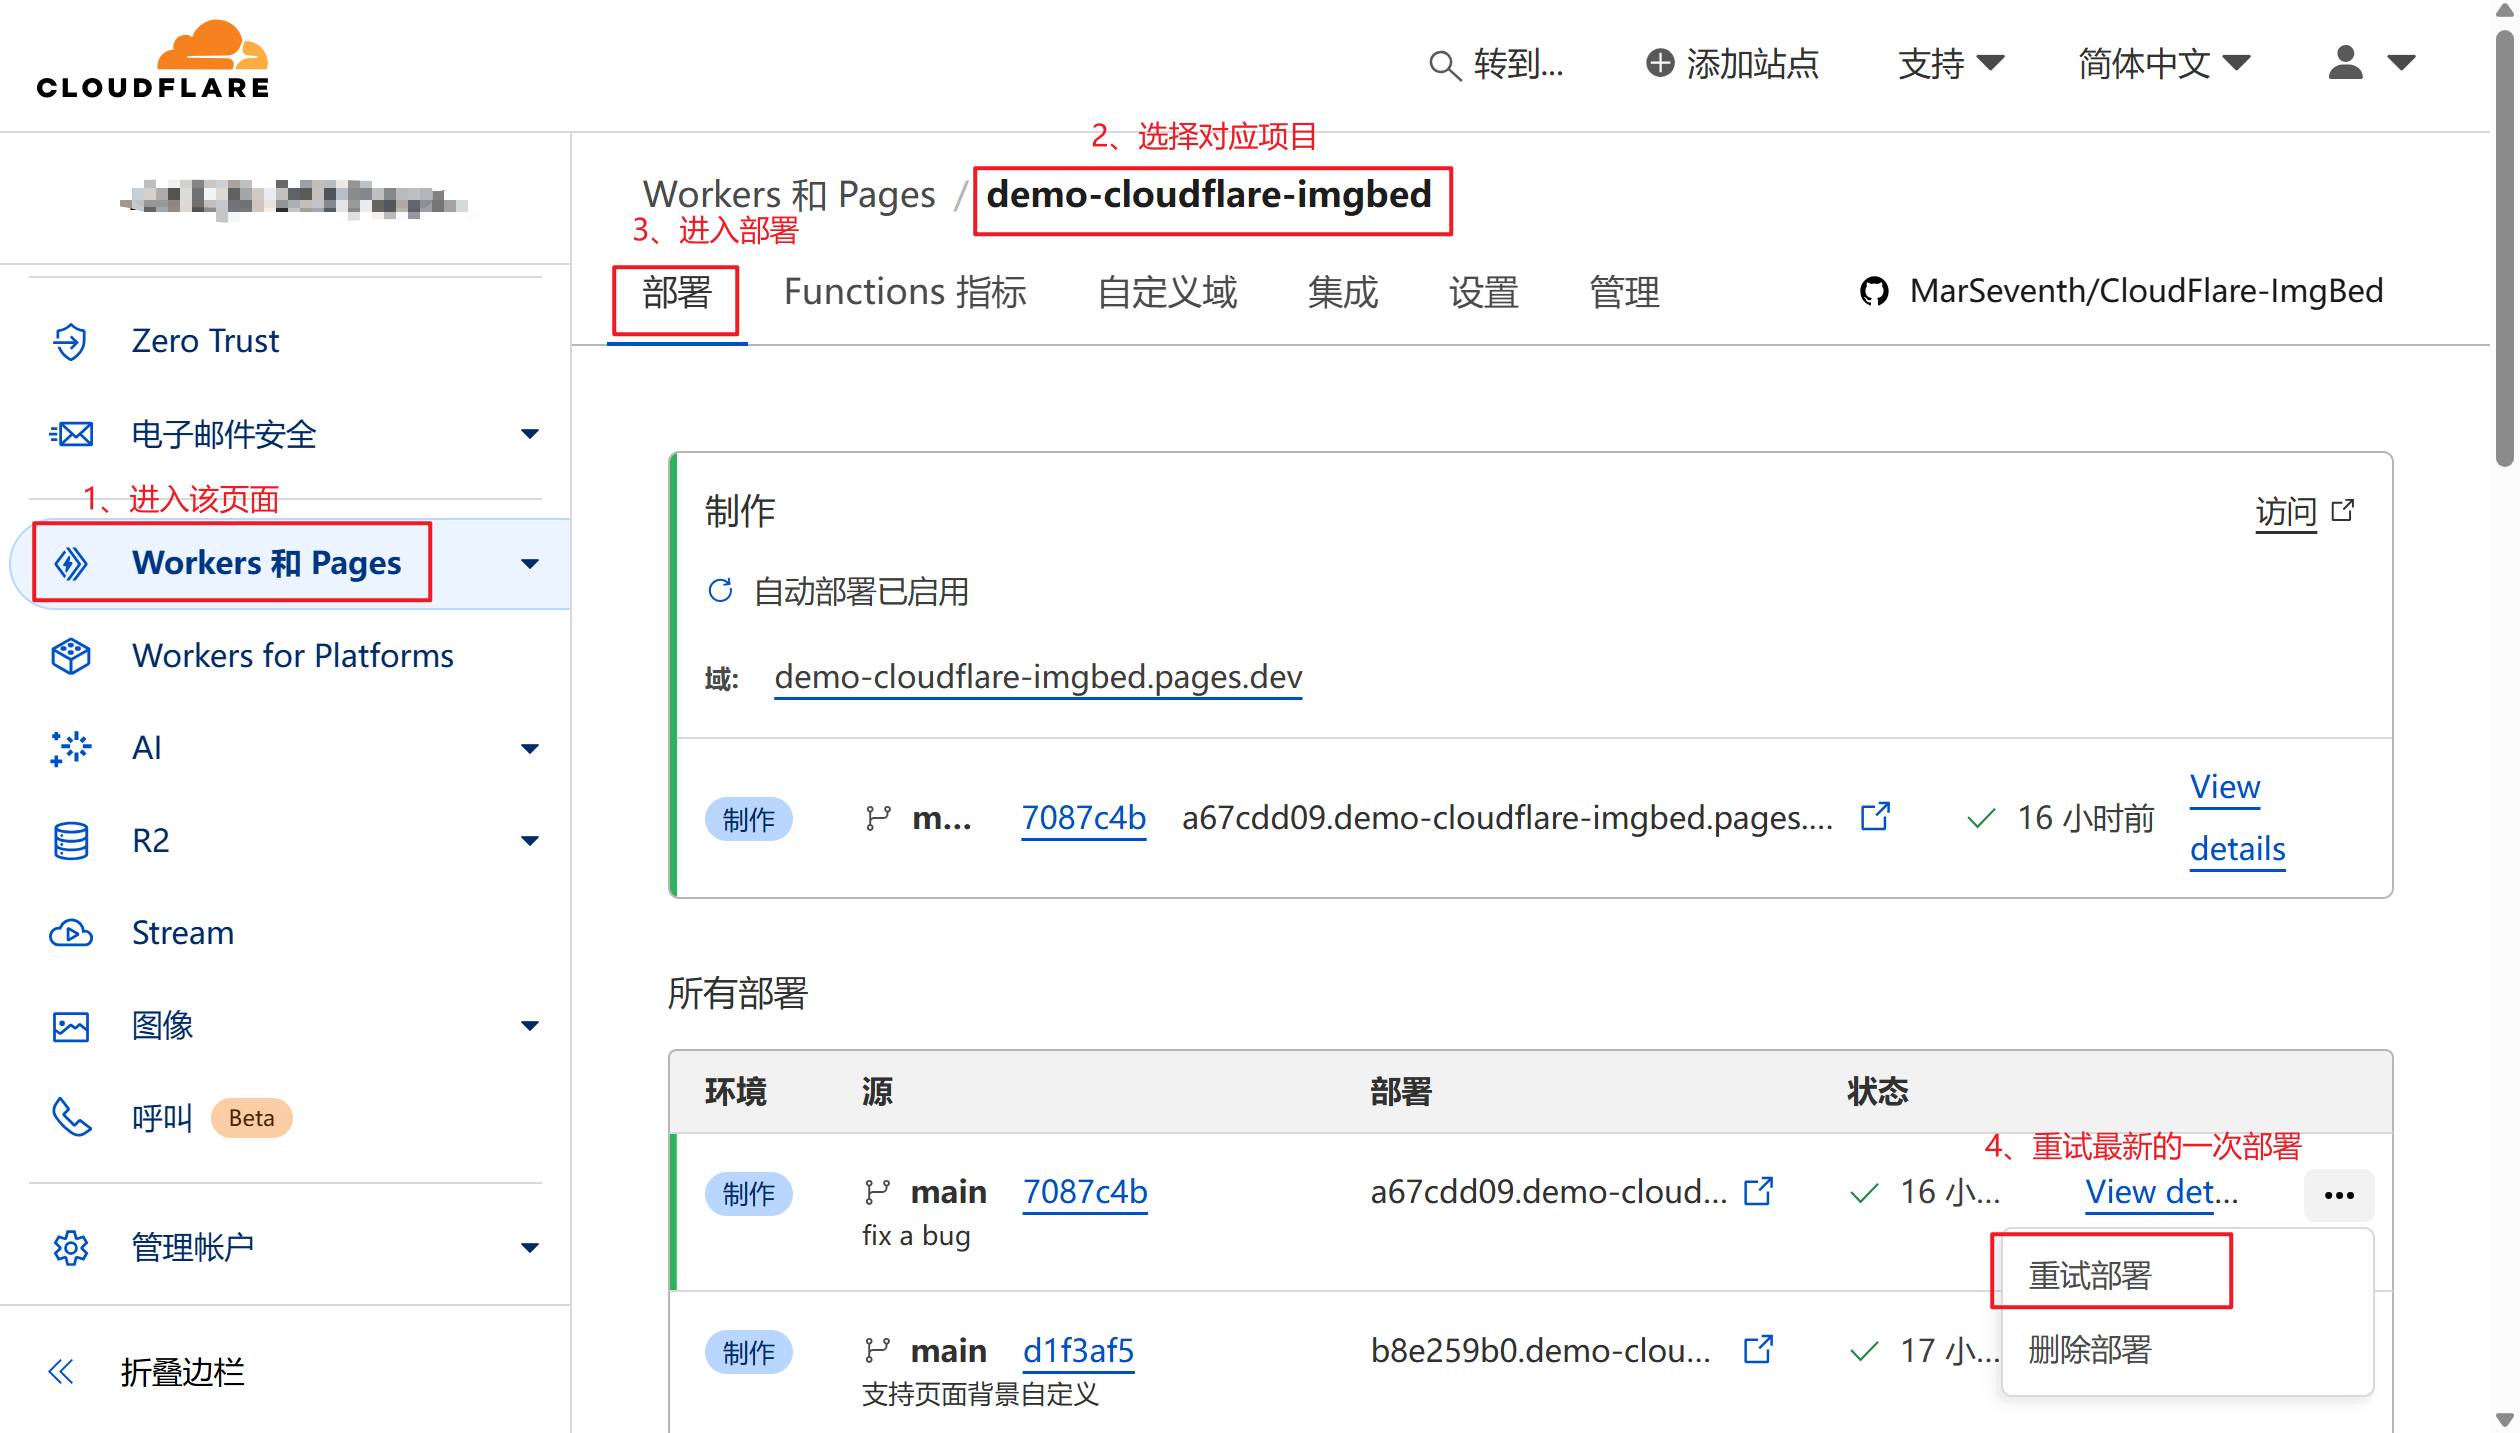
🔄 Step 4: Redeploy
After binding the database, you need to redeploy for it to take effect:
- Go to the project's "Deployments" page
- Find the latest deployment record
- Click the "..." menu on the right
- Select "Retry deployment"
- Wait for deployment to complete
🚀 Next Steps
At this point, you have completed the deployment of the project on Cloudflare Pages, but you have not yet added storage channels. For adding storage channels and other settings, please refer to Configuration Guide.